Menus in Java Gnome
In this part of the Java Gnome programming tutorial, we will work with menus.A menubar is one of the most common parts of the GUI application. It is a group of commands located in various menus. While in console applications you have to remember all those arcane commands, here we have most of the commands grouped into logical parts. These are accepted standards that further reduce the amount of time spending to learn a new application.
Simple menu
In our first example, we will create a menubar with one file menu. The menu will have only one menu item. By selecting the item the application quits.simplemenu.java
package com.zetcode;This is a small example with minimal menubar functionality.
import org.gnome.gdk.Event;
import org.gnome.gtk.Gtk;
import org.gnome.gtk.Menu;
import org.gnome.gtk.MenuBar;
import org.gnome.gtk.MenuItem;
import org.gnome.gtk.VBox;
import org.gnome.gtk.Widget;
import org.gnome.gtk.Window;
import org.gnome.gtk.WindowPosition;
/**
* ZetCode Java Gnome tutorial
*
* This program creates a simple menu.
*
* @author jan bodnar
* website zetcode.com
* last modified March 2009
*/
public class GSimpleMenu extends Window {
public GSimpleMenu() {
setTitle("Simple menu");
initUI();
setDefaultSize(250, 200);
setPosition(WindowPosition.CENTER);
showAll();
}
private void initUI() {
connect(new Window.DeleteEvent() {
public boolean onDeleteEvent(Widget source, Event event) {
Gtk.mainQuit();
return false;
}
});
VBox vbox = new VBox(false, 0);
MenuBar menuBar = new MenuBar();
 MenuItem fileItem = new MenuItem("File");
 menuBar.append(fileItem);
Menu quitMenu = new Menu();
MenuItem quitItem = new MenuItem("Quit");
quitItem.connect(new MenuItem.Activate() {
public void onActivate(MenuItem menuItem) {
Gtk.mainQuit();
}
});
quitMenu.append(quitItem);
fileItem.setSubmenu(quitMenu);
vbox.packStart(menuBar, false, false, 3);
add(vbox);
}
public static void main(String[] args) {
Gtk.init(args);
new GSimpleMenu();
Gtk.main();
}
}
MenuBar menuBar = new MenuBar();MenuBar widget is created.
MenuItem fileItem = new MenuItem("File");
menuBar.append(fileItem);
Toplevel MenuItem is created. Menu quitMenu = new Menu();Quit MenuItem is created and appended to the quit Menu.
MenuItem quitItem = new MenuItem("Quit");
...
quitMenu.append(quitItem);
fileItem.setSubmenu(quitMenu);Quit menu is set a a submenu of the toplevel file menu item.
VBox vbox = new VBox(false, 0);Unlike in other toolkits, we have to take care of the layout management of the menubar ourselves. We put the menubar into the vertical box.
...
vbox.packStart(menuBar, false, false, 3);
add(vbox);
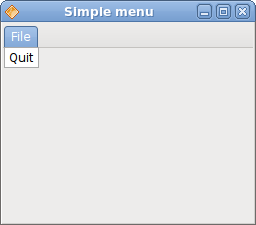
Figure: Simple menu
Image menu
In the next example, we will further explore menus. We will use images and a separator.imagemenu.java
package com.zetcode;The code example shows how to use images and separators in menus in Java Gnome.
import org.gnome.gtk.Gtk;
import org.gnome.gtk.ImageMenuItem;
import org.gnome.gtk.Menu;
import org.gnome.gtk.MenuBar;
import org.gnome.gtk.MenuItem;
import org.gnome.gtk.SeparatorMenuItem;
import org.gnome.gtk.Stock;
import org.gnome.gtk.VBox;
import org.gnome.gtk.Window;
import org.gnome.gtk.WindowPosition;
/**
* ZetCode Java Gnome tutorial
*
* This program shows images in
* the menu.
*
* @author jan bodnar
* website zetcode.com
* last modified March 2009
*/
public class GImageMenu extends Window {
public GImageMenu() {
setTitle("ImageMenu");
initUI();
setDefaultSize(250, 200);
setPosition(WindowPosition.CENTER);
showAll();
}
private void initUI() {
VBox vbox = new VBox(false, 0);
add(vbox);
MenuBar menuBar = new MenuBar();
MenuItem file = new MenuItem("_File");
Menu fileMenu = new Menu();
 ImageMenuItem imnew = new ImageMenuItem(Stock.NEW);
 ImageMenuItem imopen = new ImageMenuItem(Stock.OPEN);
 ImageMenuItem imquit = new ImageMenuItem(Stock.QUIT);
imquit.connect(new MenuItem.Activate() {
public void onActivate(MenuItem menuItem) {
Gtk.mainQuit();
}
});
fileMenu.append(imnew);
fileMenu.append(imopen);
fileMenu.append(new SeparatorMenuItem());
fileMenu.append(imquit);
file.setSubmenu(fileMenu);
menuBar.append(file);
vbox.packStart(menuBar, false, false, 3);
}
public static void main(String[] args) {
Gtk.init(args);
new GImageMenu();
Gtk.main();
}
}
ImageMenuItem imnew = new ImageMenuItem(Stock.NEW);ImageMenuItem objects are created. The images come from the internal stock of images.
ImageMenuItem imopen = new ImageMenuItem(Stock.OPEN);
ImageMenuItem imquit = new ImageMenuItem(Stock.QUIT);
fileMenu.append(new SeparatorMenuItem());This code line creates a separator. It is used to separate menu items into logical groups.
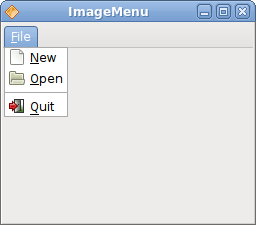
Figure: Image menu
CheckMenuItem
A CheckMenuItem is a menu item with a check box. It can be used to work with boolean properties.checkmenuitem.java
package com.zetcode;In our code example we show a check menu item. If the check box is activated, the statusbar widget is shown. If not, the statusbar is hidden.
import org.gnome.gdk.Event;
import org.gnome.gtk.CheckMenuItem;
import org.gnome.gtk.Gtk;
import org.gnome.gtk.Label;
import org.gnome.gtk.Menu;
import org.gnome.gtk.MenuBar;
import org.gnome.gtk.MenuItem;
import org.gnome.gtk.Statusbar;
import org.gnome.gtk.VBox;
import org.gnome.gtk.Widget;
import org.gnome.gtk.Window;
import org.gnome.gtk.WindowPosition;
/**
* ZetCode Java Gnome tutorial
*
* This program creates checked menu
* item.
*
* @author jan bodnar
* website zetcode.com
* last modified March 2009
*/
public class GCheckMenuItem extends Window {
private Statusbar statusbar;
public GCheckMenuItem() {
setTitle("Check menu item");
initUI();
connect(new Window.DeleteEvent() {
public boolean onDeleteEvent(Widget source, Event event) {
Gtk.mainQuit();
return false;
}
});
setDefaultSize(250, 200);
setPosition(WindowPosition.CENTER);
showAll();
}
private void initUI() {
VBox vbox = new VBox(false, 0);
MenuBar menuBar = new MenuBar();
MenuItem fileItem = new MenuItem("File");
menuBar.append(fileItem);
Menu fileMenu = new Menu();
MenuItem quitItem = new MenuItem("Quit");
quitItem.connect(new MenuItem.Activate() {
public void onActivate(MenuItem menuItem) {
Gtk.mainQuit();
}
});
fileMenu.append(quitItem);
fileItem.setSubmenu(fileMenu);
Menu viewmenu = new Menu();
MenuItem view = new MenuItem("View");
view.setSubmenu(viewmenu);
CheckMenuItem stat = new CheckMenuItem("View Statusbar");
stat.setActive(true);
viewmenu.append(stat);
menuBar.append(view);
statusbar = new Statusbar();
statusbar.setMessage("Ready");
vbox.packStart(menuBar, false, false, 0);
vbox.packStart(new Label(""), true, false, 0);
vbox.packStart(statusbar, false, false, 0);
stat.connect(new MenuItem.Activate() {
public void onActivate(MenuItem menuItem) {
CheckMenuItem item = (CheckMenuItem) menuItem;
  if (item.getActive()) {
      statusbar.show();
  } else {
      statusbar.hide();
  }
}
});
add(vbox);
}
public static void main(String[] args) {
Gtk.init(args);
new GCheckMenuItem();
Gtk.main();
}
}
CheckMenuItem stat = new CheckMenuItem("View Statusbar");
CheckMenuItem widget is created. stat.setActive(true);The setActive() method checks/unchecks the check menu item.
if (item.getActive()) {
statusbar.show();
} else {
statusbar.hide();
}
Depending on the state of the CheckMenuItem, we show or hide the statusbar widget. 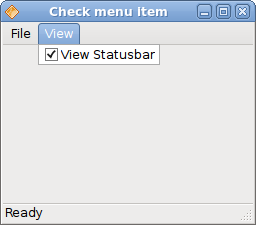
Figure: CheckMenuItem
Submenu
Our final example demonstrates how to create a submenu in Java Gnome.submenu.java
package com.zetcode;Submenu creation.
import org.gnome.gdk.Event;
import org.gnome.gtk.Gtk;
import org.gnome.gtk.Menu;
import org.gnome.gtk.MenuBar;
import org.gnome.gtk.MenuItem;
import org.gnome.gtk.VBox;
import org.gnome.gtk.Widget;
import org.gnome.gtk.Window;
import org.gnome.gtk.WindowPosition;
/**
* ZetCode Java Gnome tutorial
*
* This program creates a submenu.
*
* @author jan bodnar
* website zetcode.com
* last modified March 2009
*/
public class GSubmenu extends Window {
public GSubmenu() {
setTitle("Simple menu");
initUI();
connect(new Window.DeleteEvent() {
public boolean onDeleteEvent(Widget source, Event event) {
Gtk.mainQuit();
return false;
}
});
setDefaultSize(250, 200);
setPosition(WindowPosition.CENTER);
showAll();
}
private void initUI() {
VBox vbox = new VBox(false, 0);
MenuBar menuBar = new MenuBar();
MenuItem fileItem = new MenuItem("File");
menuBar.append(fileItem);
Menu fileMenu = new Menu();
MenuItem quitItem = new MenuItem("Quit");
quitItem.connect(new MenuItem.Activate() {
public void onActivate(MenuItem menuItem) {
Gtk.mainQuit();
}
});
// submenu creation
Menu imenu = new Menu();
 MenuItem importm = new MenuItem("Import");
 importm.setSubmenu(imenu);
 MenuItem inews = new MenuItem("Import news feed...");
 MenuItem ibookmarks = new MenuItem("Import bookmarks...");
 MenuItem imail = new MenuItem("Import mail...");

 imenu.append(inews);
 imenu.append(ibookmarks);
 imenu.append(imail);
fileMenu.append(importm);
fileMenu.append(quitItem);
fileItem.setSubmenu(fileMenu);
vbox.packStart(menuBar, false, false, 3);
add(vbox);
}
public static void main(String[] args) {
Gtk.init(args);
new GSubmenu();
Gtk.main();
}
}
Menu imenu = new Menu();A submenu is a Menu.
MenuItem importm = new MenuItem("Import");
importm.setSubmenu(imenu);
It is a submenu of a menu item, which belogs to toplevel file menu. MenuItem inews = new MenuItem("Import news feed...");
MenuItem ibookmarks = new MenuItem("Import bookmarks...");
MenuItem imail = new MenuItem("Import mail...");
imenu.append(inews);
imenu.append(ibookmarks);
imenu.append(imail);
Submenu has it's own menu items. 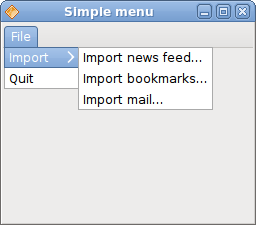
Figure: Submenu
In this chapter of the Java Gnome programming library, we showed, how to work with menus.
No comments:
Post a Comment