Introducing Widgets in Java Gnome
In this part of the Java Gnome programming tutorial, we continue introducing widgets.Entry
The Entry is a single line text entry field. This widget is used to enter textual data.entry.java
package com.zetcode;This example shows an entry widget and a label. The text that we key in the entry is displayed immediately in the label control.
import org.gnome.gdk.Event;
import org.gnome.gtk.Editable;
import org.gnome.gtk.Entry;
import org.gnome.gtk.Fixed;
import org.gnome.gtk.Gtk;
import org.gnome.gtk.Label;
import org.gnome.gtk.Widget;
import org.gnome.gtk.Window;
import org.gnome.gtk.WindowPosition;
/**
* ZetCode Java Gnome tutorial
*
* This program shows how to use
* an Entry widget.
*
* @author jan bodnar
* website zetcode.com
* last modified March 2009
*/
public class GEntry extends Window {
private Label label;
private Entry entry;
public GEntry() {
setTitle("Entry");
initUI();
connect(new Window.DeleteEvent() {
public boolean onDeleteEvent(Widget source, Event event) {
Gtk.mainQuit();
return false;
}
});
setDefaultSize(250, 200);
setPosition(WindowPosition.CENTER);
showAll();
}
public void initUI() {
label = new Label("...");
entry = new Entry();
 entry.connect(new Entry.Changed() {
   public void onChanged(Editable editable) {
       label.setLabel(entry.getText());
   }
 });
Fixed fix = new Fixed();
fix.put(entry, 60, 100);
fix.put(label, 60, 40);
add(fix);
}
public static void main(String[] args) {
Gtk.init(args);
new GEntry();
Gtk.main();
}
}
entry = new Entry();Entry widget is created.
entry.connect(new Entry.Changed() {
public void onChanged(Editable editable) {
label.setLabel(entry.getText());
}
});
If the text in the Entry widget is changed, we call the onChanged() method. In this method, we get the text from the Entry widget and set it to the label. 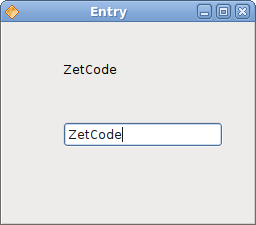
Figure: Entry Widget
Scale
The Scale is a widget, that lets the user graphically select a value by sliding a knob within a bounded interval. Our example will show a volume control.hscale.java
package com.zetcode;In the example above, we have HScale and Image widgets. By dragging the scale we change the image on the Image widget.
import java.io.FileNotFoundException;
import org.gnome.gdk.Event;
import org.gnome.gdk.Pixbuf;
import org.gnome.gtk.Fixed;
import org.gnome.gtk.Gtk;
import org.gnome.gtk.HScale;
import org.gnome.gtk.Image;
import org.gnome.gtk.Range;
import org.gnome.gtk.Widget;
import org.gnome.gtk.Window;
import org.gnome.gtk.WindowPosition;
/**
* Java Gnome tutorial
*
* This program shows how to use
* the HScale widget. It implements a
* volume control.
*
* @author jan bodnar
* website zetcode.com
* last modified March 2009
*/
public class GHScale extends Window {
private HScale hscale;
private Image image;
private Pixbuf mute;
private Pixbuf min;
private Pixbuf med;
private Pixbuf max;
public GHScale() {
setTitle("HScale");
initUI();
connect(new Window.DeleteEvent() {
public boolean onDeleteEvent(Widget source, Event event) {
Gtk.mainQuit();
return false;
}
});
setDefaultSize(260, 120);
setPosition(WindowPosition.CENTER);
showAll();
}
public void initUI() {
loadImages();
hscale = new HScale(0, 99, 1);
hscale.setSizeRequest(130, 45);
hscale.setCanFocus(false);
image = new Image("mute.png");
hscale.connect(new HScale.ValueChanged() {
public void onValueChanged(Range range) {
int pos = (int) hscale.getValue();
 if (pos == 0) {
     image.setImage(mute);
 } else if (pos > 0 && pos <= 30) {
     image.setImage(min);
 } else if (pos > 30 && pos < 80) {
     image.setImage(med);
 } else {
     image.setImage(max);
 }
}
});
Fixed fixed = new Fixed();
fixed.put(hscale, 40, 20);
fixed.put(image, 220, 40);
add(fixed);
}
private void loadImages() {
try {
mute = new Pixbuf("mute.png");
min = new Pixbuf("min.png");
med = new Pixbuf("med.png");
max = new Pixbuf("max.png");
} catch (FileNotFoundException e) {
e.printStackTrace();
}
}
public static void main(String[] args) {
Gtk.init(args);
new GHScale();
Gtk.main();
}
}
hscale = new HScale(0, 99, 1);HScale widget is created. The parameters are lower boundary, upper boundary and step.
int pos = (int) hscale.getValue();In the onValueChanged() method we obtain the value of the scale widget.
if (pos == 0) {
image.setImage(mute);
} else if (pos > 0 && pos <= 30) {
image.setImage(min);
} else if (pos > 30 && pos < 80) {
image.setImage(med);
} else {
image.setImage(max);
}
Depending on the obtained value, we change the picture in the image widget. 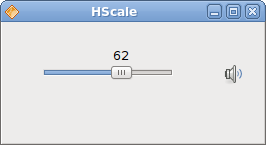
Figure: HScale Widget
ToggleButton
ToggleButton is a button that has two states. Pressed and not pressed. You toggle between these two states by clicking on it. There are situations where this functionality fits well.togglebuttons.java
package com.zetcode;In our example, we show three toggle buttons and a DrawingArea. We set the background color of the area to black. The togglebuttons will toggle the red, green and blue parts of the color value. The background color will depend on which togglebuttons we have pressed.
import org.gnome.gdk.Color;
import org.gnome.gdk.Event;
import org.gnome.gtk.DrawingArea;
import org.gnome.gtk.Fixed;
import org.gnome.gtk.Gtk;
import org.gnome.gtk.StateType;
import org.gnome.gtk.ToggleButton;
import org.gnome.gtk.Widget;
import org.gnome.gtk.Window;
import org.gnome.gtk.WindowPosition;
/**
* ZetCode Java Gnome tutorial
*
* This program demonstrates the ToggleButton
* widget. Three toggle buttons control the
* color of a drawing area.
*
* @author jan bodnar
* website zetcode.com
* last modified March 2009
*/
public class GToggleButton extends Window
implements ToggleButton.Toggled {
private ToggleButton tb1;
private ToggleButton tb2;
private ToggleButton tb3;
private DrawingArea darea;
private Color color;
public GToggleButton() {
setTitle("ToggleButton");
initUI();
setPosition(WindowPosition.CENTER);
setSizeRequest(350, 220);
showAll();
}
public void initUI() {
color = new Color(0, 0, 0);
connect(new Window.DeleteEvent() {
public boolean onDeleteEvent(Widget source, Event event) {
Gtk.mainQuit();
return false;
}
});
Fixed fixed = new Fixed();
 tb1 = new ToggleButton("Red");
 tb1.setSizeRequest(80, 35);
 tb1.connect(this);
tb2 = new ToggleButton("Green");
tb2.setSizeRequest(80, 35);
tb2.connect(this);
tb3 = new ToggleButton("Blue");
tb3.setSizeRequest(80, 35);
tb3.connect(this);
 darea = new DrawingArea();
 darea.modifyBackground(StateType.NORMAL, Color.BLACK);
 darea.setSizeRequest(150, 150);
fixed.put(tb1, 20, 20);
fixed.put(tb2, 20, 65);
fixed.put(tb3, 20, 110);
fixed.put(darea, 150, 20);
add(fixed);
}
public void onToggled(ToggleButton toggleButton) {
int red = color.getRed();
int green = color.getGreen();
int blue = color.getBlue();
 if ("Red".equals(toggleButton.getLabel())) {
     if (toggleButton.getActive()) {
         red = 65535;
     } else {
         red = 0;
     }
 }
if ("Green".equals(toggleButton.getLabel())) {
if (toggleButton.getActive()) {
green = 65535;
} else {
green = 0;
}
}
if ("Blue".equals(toggleButton.getLabel())) {
if (toggleButton.getActive()) {
blue = 65535;
} else {
blue = 0;
}
}
 color = new Color(red, green, blue);
 darea.modifyBackground(StateType.NORMAL, color);
}
public static void main(String[] args) {
Gtk.init(args);
new GToggleButton();
Gtk.main();
}
}
color = new Color(0, 0, 0);This is the color value that is going to be updated with the toggle buttons.
tb1 = new ToggleButton("Red");
tb1.setSizeRequest(80, 35);
tb1.connect(this);
The ToggleButton widget is created. We set it's size to 80x35 pixels. It is connected to the onToggled() method. darea = new DrawingArea();The DrawingArea widget is the widget, that displays the color, mixed by the toggle buttons. At start, it shows black color.
darea.modifyBackground(StateType.NORMAL, Color.BLACK);
darea.setSizeRequest(150, 150);
if ("Red".equals(toggleButton.getLabel())) {
if (toggleButton.getActive()) {
red = 65535;
} else {
red = 0;
}
}
We update the red part of the color based on the state of the red toggle button. color = new Color(red, green, blue);The color value is updated and set to the DrawingArea widget.
darea.modifyBackground(StateType.NORMAL, color);
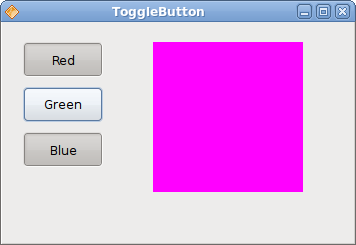
Figure: ToggleButton widget
Calendar
Our final widget is the Calendar widget. It is used to work with dates.calendar.java
package com.zetcode;We have the Calendar widget and a Label. The selected day from the calendar is shown in the label.
import org.gnome.gdk.Event;
import org.gnome.gtk.Calendar;
import org.gnome.gtk.Gtk;
import org.gnome.gtk.Label;
import org.gnome.gtk.VBox;
import org.gnome.gtk.Widget;
import org.gnome.gtk.Window;
import org.gnome.gtk.WindowPosition;
/**
* ZetCode Java Gnome tutorial
*
* This program demonstrates the Calendar
* widget. We show a selected date in a
* label widget.
*
* @author jan bodnar
* website zetcode.com
* last modified March 2009
*/
public class GCalendar extends Window {
private Calendar calendar;
private Label label;
public GCalendar() {
setTitle("Calendar");
initUI();
connect(new Window.DeleteEvent() {
public boolean onDeleteEvent(Widget source, Event event) {
Gtk.mainQuit();
return false;
}
});
setDefaultSize(260, 120);
setPosition(WindowPosition.CENTER);
showAll();
}
private void initUI() {
VBox vbox = new VBox(false, 1);
calendar = new Calendar();
label = new Label(getDate());
calendar.connect(new Calendar.DaySelected() {
public void onDaySelected(Calendar calendar) {
label.setLabel(getDate());
}
});
vbox.add(calendar);
label.setSizeRequest(-1, 50);
vbox.add(label);
add(vbox);
}
private String getDate() {
int year = calendar.getDateYear();
int month = calendar.getDateMonth();
int day = calendar.getDateDay();
String dateLabel = month + "/" + day + "/" + year;
return dateLabel;
}
public static void main(String[] args) {
Gtk.init(args);
new GCalendar();
Gtk.main();
}
}
calendar = new Calendar();Calendar widget is created.
 public void onDaySelected(Calendar calendar) {
     label.setLabel(getDate());
 };
In the onDaySelected() method we update the label to the currently selected date. 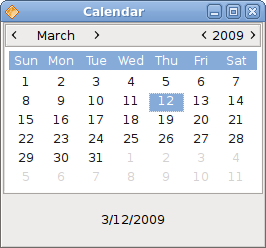
Figure: Calendar
In this chapter, we finished talking about widgets in Java Gnome.
No comments:
Post a Comment