QtJambi dialogs
In this part of the QtJambi programming tutorial, we will work with dialogs.Dialog windows or dialogs are an indispensable part of most modern GUI applications. A dialog is defined as a conversation between two or more persons. In a computer application a dialog is a window which is used to "talk" to the application. A dialog is used to input data, modify data, change the application settings etc. Dialogs are important means of communication between a user and a computer program.
Message boxes
Message boxes are convenient dialogs that provide messages to the user the application. The message consists of text and image data.package com.zetcode;We use the GridLayout manager to set up a grid of five buttons. Each of the buttons shows a different message box.
import com.trolltech.qt.QSignalEmitter;
import com.trolltech.qt.gui.QApplication;
import com.trolltech.qt.gui.QGridLayout;
import com.trolltech.qt.gui.QMessageBox;
import com.trolltech.qt.gui.QPushButton;
import com.trolltech.qt.gui.QWidget;
/**
* ZetCode QtJambi tutorial
*
* This program demonstrates
* QMessageBox dialogs
*
* @author jan bodnar
* website zetcode.com
* last modified March 2009
*/
public class JambiApp extends QWidget {
public JambiApp() {
setWindowTitle("Message Dialogs");
initUI();
resize(220, 90);
move(400, 300);
show();
}
private void initUI() {
QGridLayout grid = new QGridLayout(this);
grid.setSpacing(2);
QPushButton error = new QPushButton("Error", this);
QPushButton warning = new QPushButton("Warning", this);
QPushButton question = new QPushButton("Question", this);
QPushButton information = new QPushButton("Information", this);
QPushButton about = new QPushButton("About", this);
grid.addWidget(error, 0, 0);
grid.addWidget(warning, 0, 1);
grid.addWidget(question, 1, 0);
grid.addWidget(information, 1, 1);
grid.addWidget(about, 2, 0);
error.clicked.connect(this, "showDialog()");
warning.clicked.connect(this, "showDialog()");
question.clicked.connect(this, "showDialog()");
information.clicked.connect(this, "showDialog()");
about.clicked.connect(this, "showDialog()");
}
private void showDialog() {
QPushButton button = (QPushButton) QSignalEmitter.signalSender();
if ("Error".equals(button.text())) {
    QMessageBox.critical(this, "Error", "Error loading file!");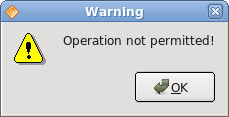
} else if ("Warning".equals(button.text())) {
QMessageBox.warning(this, "Warning", "Operation not permitted!");
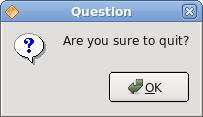
} else if ("Question".equals(button.text())) {
QMessageBox.question(this, "Question", "Are you sure to quit?");
} else if ("Information".equals(button.text())) {
QMessageBox.information(this, "Information", "Download completed.");
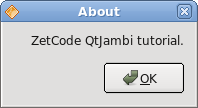
} else if ("About".equals(button.text())) {
QMessageBox.about(this, "About", "ZetCode QtJambi tutorial.");
}
}
public static void main(String[] args) {
QApplication.initialize(args);
new JambiApp();
QApplication.exec();
}
}
QPushButton button = (QPushButton) QSignalEmitter.signalSender();Here we determine, which button called the showDialog() method.
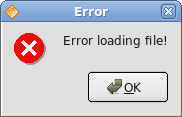
if ("Error".equals(button.text())) {
QMessageBox.critical(this, "Error", "Error loading file!");
}
In case we pressed the error button, we show the error dialog. We use static methods of the QMessageBox class to show the message boxes. 
QInputDialog
The QInputDialog class provides a simple convenience dialog to get a single value from the user. The input value can be a string, a number or an item from a list. A label must be set to tell the user what they should enter.package com.zetcode;In the code example, we have a button and a line edit. The button shows an input dialog. We get some text and the text is shown in the line edit widget.
import com.trolltech.qt.core.Qt;
import com.trolltech.qt.gui.QApplication;
import com.trolltech.qt.gui.QInputDialog;
import com.trolltech.qt.gui.QLineEdit;
import com.trolltech.qt.gui.QPushButton;
import com.trolltech.qt.gui.QWidget;
/**
* ZetCode QtJambi tutorial
*
* This program shows an input
* dialog
*
* @author jan bodnar
* website zetcode.com
* last modified March 2009
*/
public class JambiApp extends QWidget {
QLineEdit edit;
public JambiApp() {
setWindowTitle("Input Dialog");
initUI();
move(400, 300);
show();
}
private void initUI() {
setGeometry(300, 300, 350, 80);
QPushButton show = new QPushButton("Dialog", this);
show.clicked.connect(this, "showDialog()");
show.setFocusPolicy(Qt.FocusPolicy.NoFocus);
show.move(20, 20);
edit = new QLineEdit(this);
edit.move(130, 22);
}
private void showDialog() {
String text = QInputDialog.getText(
        this, "Input Dialog", "Enter your name");
if (text!=null && !text.trim().isEmpty()) {
    edit.setText(text);
}
}
public static void main(String[] args) {
QApplication.initialize(args);
new JambiApp();
QApplication.exec();
}
}
String text = QInputDialog.getText(The getText() static method creates the input dialog. The text from the dialog is stored in the text variable.
this, "Input Dialog", "Enter your name");
if (text!=null && !text.trim().isEmpty()) {
edit.setText(text);
}
Before we update the line edit, we ensure, that the text variable is not null and that it is not empty and does not consists only from spaces. 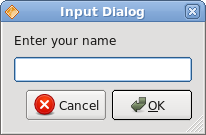
Figure: Input dialog
QColorDialog
The QColorDialog class provides a dialog widget for specifying colors. The color dialog's function is to allow users to choose colors.package com.zetcode;We show a some text in the center of the window. By clicking on the area of the window, we show a color dialog. We change the text foreground color to the selected color from the dialog.
import com.trolltech.qt.core.Qt;
import com.trolltech.qt.gui.QApplication;
import com.trolltech.qt.gui.QColor;
import com.trolltech.qt.gui.QColorDialog;
import com.trolltech.qt.gui.QLabel;
import com.trolltech.qt.gui.QMouseEvent;
import com.trolltech.qt.gui.QVBoxLayout;
import com.trolltech.qt.gui.QWidget;
import java.util.Formatter;
/**
* ZetCode QtJambi tutorial
*
* In this program, we use the
* QColorDialog to change the color
* of a label text
*
* @author jan bodnar
* website zetcode.com
* last modified March 2009
*/
public class JambiApp extends QWidget {
QLabel label;
public JambiApp() {
setWindowTitle("Color Dialog");
initUI();
resize(250, 200);
move(400, 300);
show();
}
private void initUI() {
label = new QLabel("ZetCode QtJambi tutorial", this);
QVBoxLayout vbox = new QVBoxLayout(this);
label.setAlignment(Qt.AlignmentFlag.AlignCenter);
vbox.addWidget(label);
}
@Override
public void mousePressEvent(QMouseEvent event) {
QColor color = QColorDialog.getColor();
if (!color.isValid()) return;
Formatter fmt = new Formatter();
fmt.format("QWidget { color: %s }", color.name());

label.setStyleSheet(fmt.toString());
}
public static void main(String[] args) {
QApplication.initialize(args);
new JambiApp();
QApplication.exec();
}
}
@OverrideIn order to receive mouse press events for our window, we must reimplement the mousePressEvent() method.
public void mousePressEvent(QMouseEvent event) {
...
}
QColor color = QColorDialog.getColor();The QColorDialog is being created. The selected color is stored in the color variable.
Formatter fmt = new Formatter();Here we update the foreground color of the label's text.
fmt.format("QWidget { color: %s }", color.name());
label.setStyleSheet(fmt.toString());
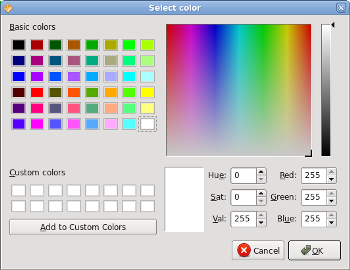
Figure: QColorDialog
QFontDialog
The QFontDialog class provides a dialog widget for selecting a font.package com.zetcode;This example is similar to the previous one. This time, we change the font of the text.
import com.trolltech.qt.core.Qt;
import com.trolltech.qt.gui.QApplication;
import com.trolltech.qt.gui.QFontDialog;
import com.trolltech.qt.gui.QLabel;
import com.trolltech.qt.gui.QMouseEvent;
import com.trolltech.qt.gui.QVBoxLayout;
import com.trolltech.qt.gui.QWidget;
/**
* ZetCode QtJambi tutorial
*
* In this program, we use the
* QFontDialog to change the font
* of a label text
*
* @author jan bodnar
* website zetcode.com
* last modified March 2009
*/
public class JambiApp extends QWidget {
QLabel label;
public JambiApp() {
setWindowTitle("QFontColor dialog");
initUI();
resize(250, 200);
move(300, 300);
show();
}
private void initUI() {
label = new QLabel("ZetCode QtJambi tutorial", this);
QVBoxLayout vbox = new QVBoxLayout(this);
label.setAlignment(Qt.AlignmentFlag.AlignCenter);
vbox.addWidget(label);
}
@Override
public void mousePressEvent(QMouseEvent event) {
QFontDialog.Result result = QFontDialog.getFont();
if (!result.ok) return;
label.setFont(result.font);
}
public static void main(String[] args) {
QApplication.initialize(args);
new JambiApp();
QApplication.exec();
}
}
QFontDialog.Result result = QFontDialog.getFont();The QFontDialog is being created. The dialog returns the QFontDialog.Result class. This class has two fields. The font and the ok field.
if (!result.ok) return;The boolean ok variable is true, if we clicked on the OK button of the dialog. We return from the method, if the cancel button was pressed.
label.setFont(result.font);The font field stores the selected font. We update the label's font to the newly selected font.
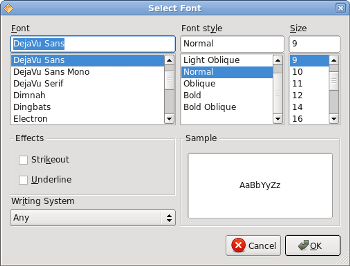
Figure: QFontDialog
In this part of the QtJambi tutorial, we worked with dialog windows.
No comments:
Post a Comment