Menus And toolbars in QtJambi
In this part of the QtJambi programming tutorial, we will work with menus and toolbar.A menubar is one of the most visible parts of the GUI application. It is a group of commands located in various menus. While in console applications you had to remember all those arcane commands, here we have most of the commands grouped into logical parts. There are accepted standards that further reduce the amount of time spending to learn a new application. Menus group commands that we can use in an application. Toolbars provide a quick access to the most frequently used commands.
Simple menu The first example will show a simple menu.
package com.zetcode;We have a menubar, a menu and an action. In order to work with menus, we must inherit from QMainWindow widget.
import com.trolltech.qt.gui.QAction;
import com.trolltech.qt.gui.QApplication;
import com.trolltech.qt.gui.QMainWindow;
import com.trolltech.qt.gui.QMenu;
/**
* ZetCode QtJambi tutorial
*
* This program shows a simple
* menu. It has one action, which
* will terminate the program, when
* selected.
*
* @author jan bodnar
* website zetcode.com
* last modified March 2009
*/
public class JambiApp extends QMainWindow {
public JambiApp() {
setWindowTitle("Simple menu");
initUI();
resize(250, 200);
move(300, 300);
show();
}
private void initUI() {
QAction quit = new QAction("&Quit", this);
QMenu file = menuBar().addMenu("&File");
file.addAction(quit);
quit.triggered.connect(QApplication.instance(), "quit()");
}
public static void main(String[] args) {
QApplication.initialize(args);
new JambiApp();
QApplication.exec();
}
}
QAction quit = new QAction("&Quit", this);
This code line creates a QAction. Each QMenu has one or more action objects. Note the ampersand (&) character. It creates a shortcut for the item. Alt + Q. It also underlines the Q character. The shortcut is active, when the file menu is dropped down. QMenu file = menuBar().addMenu("&File");
file.addAction(quit);
We create a QMenu object. The ampersand character creates a shortcut. Alt + F. The consecutive shortcuts Alt + F, Alt + Q quit the application. quit.triggered.connect(QApplication.instance(), "quit()");When we select this option from the menu, the application quits.
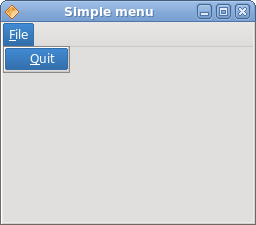
Figure: Simple menu
Creating a submenu
A submenu is a menu plugged into another menu object. The next example demonstrates this.package com.zetcode;In the example, we have three options in a submenu of a file menu.
import com.trolltech.qt.gui.QAction;
import com.trolltech.qt.gui.QApplication;
import com.trolltech.qt.gui.QMainWindow;
import com.trolltech.qt.gui.QMenu;
/**
* ZetCode QtJambi tutorial
*
* This program creates a
* submenu
*
* @author jan bodnar
* website zetcode.com
* last modified March 2009
*/
public class JambiApp extends QMainWindow {
public JambiApp() {
setWindowTitle("Submenu");
initUI();
resize(250, 200);
move(300, 300);
show();
}
private void initUI() {
QAction quit = new QAction("&Quit", this);
QMenu file = menuBar().addMenu("&File");
QMenu impm = new QMenu("Import");
QAction seeds = new QAction("Import news feed...", this);
QAction marks = new QAction("Import bookmarks...", this);
QAction mail = new QAction("Import mail...", this);
impm.addAction(seeds);
impm.addAction(marks);
impm.addAction(mail);
file.addMenu(impm);
file.addAction(quit);
quit.triggered.connect(QApplication.instance(), "quit()");
}
public static void main(String[] args) {
QApplication.initialize(args);
new JambiApp();
QApplication.exec();
}
}
QMenu file = menuBar().addMenu("&File");
QMenu impm = new QMenu("Import");
We have two QMenu objects. The file menu and the import menu. QAction seeds = new QAction("Import news feed...", this);
QAction marks = new QAction("Import bookmarks...", this);
QAction mail = new QAction("Import mail...", this);
We create three action objects. impm.addAction(seeds);We add the action objects into the import menu.
impm.addAction(marks);
impm.addAction(mail);
file.addMenu(impm);Finally, we add the import menu into the file menu.
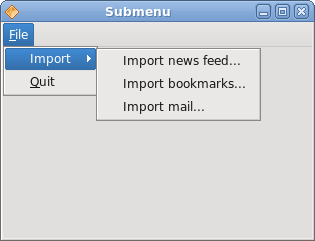
Figure: Submenu
Images, menus, separators
In the following example, we will further enhance our previous application. We will add icons to the menus, use shortcuts and a separator.package com.zetcode;In our example, we have one menu with three actions. Only the quit action will actually do something, if we select it. We also create a separator and a Ctrl + Q shortcut, which will terminate the application.
import com.trolltech.qt.gui.QAction;
import com.trolltech.qt.gui.QApplication;
import com.trolltech.qt.gui.QIcon;
import com.trolltech.qt.gui.QMainWindow;
import com.trolltech.qt.gui.QMenu;
/**
* ZetCode QtJambi tutorial
*
* This program shows image
* menus, shortcuts and a separator
*
* @author jan bodnar
* website zetcode.com
* last modified March 2009
*/
public class JambiApp extends QMainWindow {
public JambiApp() {
setWindowTitle("Image menu");
initUI();
resize(250, 200);
move(300, 300);
show();
}
private void initUI() {
QIcon newpix = new QIcon("new.png");
QIcon openpix = new QIcon("open.png");
QIcon quitpix = new QIcon("quit.png");
QAction newa = new QAction(newpix, "&New", this);
QAction open = new QAction(openpix, "&Open", this);
QAction quit = new QAction(quitpix, "&Quit", this);
quit.setShortcut("Ctrl+Q");
QMenu file;
file = menuBar().addMenu("&File");
file.addAction(newa);
file.addAction(open);
file.addSeparator();
file.addAction(quit);
quit.triggered.connect(QApplication.instance(), "quit()");
}
public static void main(String[] args) {
QApplication.initialize(args);
new JambiApp();
QApplication.exec();
}
}
QIcon newpix = new QIcon("new.png");
QIcon openpix = new QIcon("open.png");
QIcon quitpix = new QIcon("quit.png");
These are png images, that we will use in the application. QAction newa = new QAction(newpix, "&New", this);Here we create three action objects. The first parameter is the QIcon.
QAction open = new QAction(openpix, "&Open", this);
QAction quit = new QAction(quitpix, "&Quit", this);
quit.setShortcut("Ctrl+Q");
This line creates a shortcut. By pressing this shortcut, we will run the quit action, which will quit the application. file.addSeparator();We create a separator. The separator is a horizontal line, which enables us to group menu actions into some logical parts.
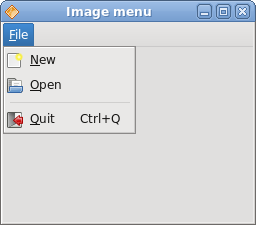
Figure: Images, shortcut and a separator
A toolbar
The QToolBar class provides a movable panel that contains a set of controls, which provide a quick access to the application actions.package com.zetcode;We create a toolbar with three action objects and one separator.
import com.trolltech.qt.gui.QAction;
import com.trolltech.qt.gui.QApplication;
import com.trolltech.qt.gui.QIcon;
import com.trolltech.qt.gui.QMainWindow;
import com.trolltech.qt.gui.QToolBar;
/**
* ZetCode QtJambi tutorial
*
* This program creates a
* toolbar
*
* @author jan bodnar
* website zetcode.com
* last modified April 2009
*/
public class JambiApp extends QMainWindow {
public JambiApp() {
setWindowTitle("Toolbar");
initUI();
resize(250, 200);
move(300, 300);
show();
}
private void initUI() {
QIcon newpi = new QIcon("new.png");
QIcon openpi = new QIcon("open.png");
QIcon quitpi = new QIcon("quit.png");
QToolBar toolbar = addToolBar("main toolbar");
toolbar.addAction(newpi, "New File");
toolbar.addAction(openpi, "Open File");
toolbar.addSeparator();
QAction quit = toolbar.addAction(quitpi,
"Quit Application");
quit.triggered.connect(QApplication.instance(), "quit()");
}
public static void main(String[] args) {
QApplication.initialize(args);
new JambiApp();
QApplication.exec();
}
}
QIcon newpi = new QIcon("new.png");
QIcon openpi = new QIcon("open.png");
QIcon quitpi = new QIcon("quit.png");
Toolbar action objects will display these icons. QToolBar toolbar = addToolBar("main toolbar");
The addToolBar() method of the QMainWindowcreates a toolbar for the application. The text string gives a toolbar a name. This name is used to reference this toolbar, because there can be multiple toolbars in one application. If we right click on the window area, we can see a checkable option, which shows/hides the toolbar. toolbar.addSeparator();We create a vertical separator.
quit.triggered.connect(QApplication.instance(), "quit()");When we click on the quit action object, the application terminates.
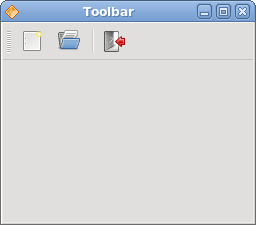
Figure: Toolbar
Undo redo
The following example demonstrates, how we can deactivate toolbar buttons on the toolbar. It is a common practice in GUI programming. For example the save button. If we save all changes of our document to the disk, the save button is deactivated in most text editors. This way the application indicates to the user, that all changes are already saved.package com.zetcode;In our example, we have three QAction objects and a separator. After several clicks on the undo or redo buttons, they become deactivated. Visually, the buttons are grayed out.
import com.trolltech.qt.QSignalEmitter;
import com.trolltech.qt.gui.QAction;
import com.trolltech.qt.gui.QApplication;
import com.trolltech.qt.gui.QIcon;
import com.trolltech.qt.gui.QMainWindow;
import com.trolltech.qt.gui.QToolBar;
/**
* ZetCode QtJambi tutorial
*
* This program disables/enables
* actions on a toolbar
*
* @author jan bodnar
* website zetcode.com
* last modified March 2009
*/
public class JambiApp extends QMainWindow {
private int count = 0;
private QAction undo;
private QAction redo;
public JambiApp() {
setWindowTitle("Undo redo");
initUI();
resize(300, 200);
move(400, 300);
show();
}
private void initUI() {
QIcon undoi = new QIcon("undo.png");
QIcon redoi = new QIcon("redo.png");
QIcon quitpi = new QIcon("quit.png");
QToolBar toolbar = addToolBar("first toolbar");
undo = toolbar.addAction(undoi, "Undo");
redo = toolbar.addAction(redoi, "Redo");
undo.triggered.connect(this, "count()");
redo.triggered.connect(this, "count()");
toolbar.addSeparator();
QAction quit = toolbar.addAction(quitpi, "Quit Application");
quit.triggered.connect(QApplication.instance(), "quit()");
}
private void count() {
QAction action = (QAction) QSignalEmitter.signalSender();
if ("Undo".equals(action.text())) {
    count += -1;
} else {
    count += 1;
}
if (count <= 0) {
    undo.setDisabled(true);
    redo.setDisabled(false);
}
if (count >= 5) {
undo.setDisabled(false);
redo.setDisabled(true);
}
}
public static void main(String[] args) {
QApplication.initialize(args);
new JambiApp();
QApplication.exec();
}
}
private int count = 0;The count variable determines, which button is activated and deactivated.
undo.triggered.connect(this, "count()");Clicking on the toolbar button, the triggered signal is emitted. We connect this signal to the count() method.
redo.triggered.connect(this, "count()");
QAction action = (QAction) QSignalEmitter.signalSender();Both toolbar buttons call the count() method. We need to tell between them. This line determines, which action object actually emitted the signal.
if ("Undo".equals(action.text())) {
count += -1;
} else {
count += 1;
}
The undo toolbar button subtracts 1 from the count variable. The redo adds 1. Depending on the value of the count variable, we enable/disable the toolbar buttons. if (count <= 0) {
undo.setDisabled(true);
redo.setDisabled(false);
}
The setDisabled() method activates or deactivates the toolbar buttons. 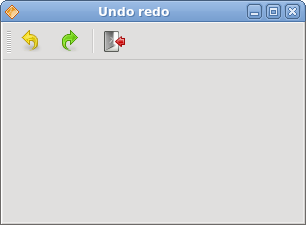
Figure: Undo redo
In this part of the QtJambi tutorial, we mentioned the menus and toolbars.
No comments:
Post a Comment